Installing Huddo Boards on WebSphere-only Connections
Let me clarify what this article is about. Huddo (also known as ISW) is selling 2 versions of their Boards product:
- Kudos Boards – The Java application that can be installed on WebSphere. Active development has stopped a few years ago
- Huddo Boards – The product consisting of several containers, which can be installed on Kubernetes or a container engine like Docker. A version with limited functionality is part of the HCL Connections component pack and known as Activities Plus. This product is actively being developed and also available for other platforms.
Although the Connections Component pack was introduced in version 6 already, many companies refrained from installing it due to the serious amount of extra infrastructure needed to run these components, which includes a Kubernetes cluster. We call these the WebSphere-only Connections installations, as they only include the WebSphere stack part of Connections.
So what if you would like to use the full power of Huddo Boards without having to install a Kubernetes cluster? That’s what this article is about.
As it’s a rather long article, let’s start with a Table of Contents.
Prerequisites
To run Huddo Boards, you’ll need a container engine. To avoid the complexity of a Kubernetes environment, you can choose to run a Docker (or Podman) host. Huddo/ISW have listed the prerequisites for such a server here. They advise using a server with at least 4 vCPU’s and 8 GB ram. The amount of disk space you need, depends on whether you run the Mongo database, S3 Minio storage and Redis cache on the same machine. They advise Docker as container engine. The disk space obviously also depends on the amount of users and the usage of Huddo Boards.
For this article, I’ll run Huddo Boards on my big container host alongside this blog, Domino and a bunch of other stuff, so I won’t create a separate VM for it. My container host is running CentOS 9 Stream with podman and podman-compose.
Preparations
There are multiple items to prepare before you can start up a Huddo Boards environment on Docker/Podman.
Decide on using paths or subdomains
A choice you will have to make is how you would like to access Huddo Boards, as this influences quite a few of the other preparations. Will you access Huddo Boards with a url like https://connections.example.com/boards or will you use a url like https://boards.example.com? In my view, the answer to this question depends on how you want to use Boards. If you want to use Boards as a component of Connections, like I will be doing in this article, then using paths is the obvious way to go. If you would like to use Boards more like a standalone product, which you want to access from several other products, then a subdomain makes more sense. Huddo Boards supports both. In this article, I’m going to show how to set it up using paths, but I’ll briefly mention where you have to pay attention if you use a subdomain.
Get a Huddo Boards licence
There are 2 versions of Huddo Boards. The one that you get for free with Connections as “Activities Plus” which is a limited version of Huddo Boards, and the paid one which gives you access to the full feature set. For both, you can go to the Huddo store, where you can create your organisation, enter the URL that you will use for Huddo Boards and either create an Activities Plus licence, or request a quote for Huddo Boards licences.
Get access to Huddo’s Quay.io repository
First create an account at https://quay.io if you don’t have one already. Then mail this account to support@huddo.com requesting access to Huddo Boards Docker repository, include your Quay.io account name in the email. They will reply when this is configured on their end.
Download the docker-compose file
Huddo/ISW have prepared a docker-compose file to use for setting up Huddo Boards on Docker/Podman, which you can download here (the file when using subdomains can be downloaded here). This file needs a lot of configuration, but I’ll get to that later.
Update: ISW replaced their docker-compose.yml by a config.zip file which contains the docker-compose.yml. an .env-file for the docker-compose file and the nginx configuration.
Download the nginx configuration file
You will need a reverse proxy to forward the traffic for Boards to the Huddo Boards containers, while forwarding the Connections traffic to WebSphere. There are options which I’ll get to, but it’s good to have this nginx configuration file as an example (here if you use subdomains).
Prepare your persistent volumes
Of course, we don’t want to lose all the information which we put in boards when we remove the Huddo Boards containers, so we’re going to need some persistent volumes. Data for Huddo Boards is stored in three data services:
- Mongodb
- S3 file store
- Redis cache
Of these, the Redis cache is usually not stored on a persistent volume. That’s why neither the Helm chart for an enterprise deployment of Huddo Boards, nor the docker-compose file by default have any values to configure this volume. For the Mongo database and the S3 (Minio) file store, however, you will have to prepare a place on your filesystem. In Kubernetes, we would assign a certain amount of space to the volumes for these persistent data stores. With Docker/Podman that’s not a common scenario. You basically just create a directory on the file system and mount that in the container. I created this structure on my container host:
huddoboards
├── docker-compose.yml
├── mongodb
├── nginx.conf
└── s3
To create the directories, you would use:
mkdir mongodb
mkdir s3
chown 1001:1001 mongodb
So the mongodb directory needs to be owned by user id 1001. The s3 directory is still owned by root. It would be preferable to have s3 use a non-root uid/gid as that would allow Huddo Boards to run rootless. If you want to run the Minio service with user id 1000 and group id 1000 (like the Enterprise version), add the “user: “1000:1000” line to your docker-compose.yml file as listed below in bold and set the rights of your persistent volume to the correct id (chown -R 1000:1000 <path-to>/s3 ).
Configure the Connections authentication
I’m going to integrate Huddo Boards in my WebSphere-only Connections installation, so I need to make sure that anyone that’s logged into Connections is authenticated to Huddo Boards as well. How to do this, depends on how you authenticate to HCL Connections. If you authenticate through the standard Connections login form or through SPNEGO or SAML, you should use this method. My Connections environment, however, is authenticating through Keycloak using OIDC. ISW/Huddo also provided documentation for this: Keycloak Authentication – Huddo Docs. It’s however a bit limited, so let me share my Keycloak config here.
Keycloak config json
{
  "clientId": "huddoboards",
  "name": "huddoboards",
  "description": "Authentication for Huddo Boards",
  "rootUrl": "",
  "adminUrl": "",
  "baseUrl": "",
  "surrogateAuthRequired": false,
  "enabled": true,
  "alwaysDisplayInConsole": false,
  "clientAuthenticatorType": "client-secret",
  "secret": "MySecret",
  "redirectUris": [
    "https://connections.example.com/api-boards/*",
    "https://connections.example.com/boards/*"
  ],
  "webOrigins": [
    "*"
  ],
  "notBefore": 0,
  "bearerOnly": false,
  "consentRequired": false,
  "standardFlowEnabled": true,
  "implicitFlowEnabled": false,
  "directAccessGrantsEnabled": true,
  "serviceAccountsEnabled": false,
  "publicClient": false,
  "frontchannelLogout": true,
  "protocol": "openid-connect",
  "attributes": {
    "client.secret.creation.time": "1718184393",
    "oauth2.device.authorization.grant.enabled": "false",
    "backchannel.logout.revoke.offline.tokens": "false",
    "use.refresh.tokens": "true",
    "oidc.ciba.grant.enabled": "false",
    "client.use.lightweight.access.token.enabled": "false",
    "backchannel.logout.session.required": "true",
    "client_credentials.use_refresh_token": "false",
    "tls.client.certificate.bound.access.tokens": "false",
    "require.pushed.authorization.requests": "false",
    "acr.loa.map": "{}",
    "display.on.consent.screen": "false",
    "token.response.type.bearer.lower-case": "false"
  },
  "authenticationFlowBindingOverrides": {},
  "fullScopeAllowed": true,
  "nodeReRegistrationTimeout": -1,
  "defaultClientScopes": [
    "web-origins",
    "acr",
    "profile",
    "roles",
    "email"
  ],
  "optionalClientScopes": [
    "address",
    "phone",
    "offline_access",
    "microprofile-jwt"
  ],
  "access": {
    "view": true,
    "configure": true,
    "manage": true
  }
}
Configuring the docker-compose file
When you’ve done the preparations, you can start configuring the docker-compose.yml file. Let’s look at the file, where I’ll highlight where you have to make changes. All my changes to the original file are in bold.
version: "3.4"

x-minio-access: &minio-access HuddoBoardsUser
x-minio-secret: &minio-secret MyMinioSecret
x-mongo-password: &mongo-password MyMongoPassword

x-app-env: &app-env
  APP_URI: https://connections.example.com/boards
  API_GATEWAY: https://connections.example.com/api-boards
  APP_URI_PATH: /boards
  REDIS_CACHE_HOST: redis
  USER_HOST: http://user
  LICENCE_HOST: http://licence
  NOTIFICATION_HOST: http://notification
  PROVIDER_HOST: http://provider
  APP_HOST: http://app
  BOARDS_EVENT_HOST: http://boards-event

x-s3-env: &s3-env
  S3_ENDPOINT: minio
  S3_ACCESS_KEY: *minio-access
  S3_SECRET_KEY: *minio-secret
  S3_BUCKET: kudosboards

x-db-env: &db-env
  MONGO_HOST: mongo
  MONGO_USER: root
  MONGO_PASSWORD: *mongo-password
  MONGO_PARAMS: authSource=admin

services:
  # Proxy
  #  nginix:   # we use the existing reverse proxy and forward the ports of the core and webfront
  #    image: nginx:1.25.3
  #    restart: always
  #    ports:
  #      - "443:443"
  #      - "80:80"
  #    volumes:
  #      - ./nginx.conf:/etc/nginx/conf.d/proxy.conf

  # UI
  webfront:
    image: quay.io/huddo/boards-webfront:2024-05-27
    restart: always
    ports:
      - 127.0.0.1:8079:8080
    environment:
      <<: [*app-env]

  # Core App routing logic
  core:
    image: quay.io/huddo/boards-core:2024-05-27
    restart: always
    ports:
      - 127.0.0.1:3002:3001
    depends_on:
      - redis
      - minio
      - licence
      - notification
    environment:
      <<: [*app-env, *s3-env]
      API_URI_PATH: /api-boards

  # Boards business logic
  app:
    image: quay.io/huddo/boards:2024-05-27
    restart: always
    environment:
      <<: [*app-env, *db-env, *s3-env]

  user:
    image: quay.io/huddo/user:2024-05-27
    restart: always
    environment:
      <<: [*app-env, *db-env, *s3-env]
      CONNECTIONS_NAME: Connections
      CONNECTIONS_CLIENT_ID: huddoboards
      CONNECTIONS_CLIENT_SECRET: MyKeycloakSecret
      CONNECTIONS_URL: https://connections.example.com
      CONNECTIONS_KEYCLOAK_URL: https://login.example.com
      CONNECTIONS_KEYCLOAK_REALM: cnx
      CONNECTIONS_KEYCLOAK_PATH: /realms
      CONNECTIONS_ADMINS: '["martdj@martdj.nl", "admin2@martdj.nl"]'

  provider:
    image: quay.io/huddo/provider:2024-05-27
    restart: always
    depends_on:
      - redis
      - minio
    environment:
      <<: [*app-env, *s3-env]

  notification:
    image: quay.io/huddo/notification:2024-05-27
    restart: always
    depends_on:
      - redis
    environment:
      <<: [*app-env, *db-env]

  #Events Service
  boards-event:
    image: quay.io/huddo/boards-event:2024-05-27
    restart: always
    depends_on:
      - redis
      - mongo
    environment:
      <<: [*app-env, *db-env]
      NOTIFIER_EMAIL_HOST: mail.example.com
      NOTIFIER_EMAIL_USERNAME: mailuser
      NOTIFIER_EMAIL_PASSWORD: mailpassword

  licence:
    image: quay.io/huddo/licence:2024-05-27
    restart: always
    depends_on:
      - user
      - redis
      - mongo
    environment:
      <<: [*db-env, *app-env]
      LICENCE: <MyLicense>

  mongo:
    image: docker.io/bitnami/mongodb:7.0
    restart: always
    environment:
      MONGODB_ADVERTISED_HOSTNAME: mongo
      MONGODB_ROOT_PASSWORD: *mongo-password
    volumes:
      - /path-to/huddoboards/mongodb:/bitnami/mongodb:Z

  minio:
    image: docker.io/minio/minio
    restart: always
    environment:
      MINIO_ROOT_USER: *minio-access
      MINIO_ROOT_PASSWORD: *minio-secret
    volumes:
      - /path-to/huddoboards/s3:/data:Z
    command: server /data
    user: "1000:1000"

  # Shared DB for internal caching, communication etc
  redis:
    image: redis
    restart: always
    environment:
      MASTER: "true"
Anchors and aliases
A note about &minio-access and *minio-access. In docker-compose files, you can use anchors and aliases. Anchors start with a ‘&’ and aliases with ‘*’. Using these, you can define a value once and use it multiple times.
Nginx container
As you can see in my docker-compose file, I’ve commented out the nginx container and made the ports of the webfront and core app public. I guess this is a bit a matter of preference, but in many cases the nginx container is not really necessary. Let’s look at some scenario’s:
User => IBM HTTP Server => WebSphere Plugin => WebSphere
                        => Huddo Boards nginx => webfront
                                              => core
In this scenario, you would make rules in the httpd.conf of the IBM HTTP Server, like described here. In the example, the traffic is forwarded to the nginx container of Huddo Boards, but there’s nothing stopping you from forwarding /boards to port 8080 and /api-boards to port 3001 (or in my case ports 8079 and 3002 as 8080 and 3001 were already in use on my container host) and skipping the nginx container.
My environment looks like this:
User => nginx => IBM HTTP Server => WebSphere Plugin => WebSphere
              => Huddo Boards webfront
              => Huddo Boards core
             (=> Customizer lite => IBM HTTP Server => WebSphere plugin etc)
Customizer lite is still on my to do list. But as you can see, there’s already a nginx reverse proxy on my container host. It makes most sense to split the traffic there and not at the IBM HTTP server, and it also makes sense to not place another nginx container behind the first one, hence my choice to forward the ports of the Webfront and Core containers. Another added advantage is that there are no Huddo containers running ports < 1024, which means that theoretically Huddo Boards could run rootless.
Release date
In my file, you can see that a date, 2024-05-27, is also in bold. This data determines which version of the Huddo Boards images is used. You can find the different releases here. When a new release is available, you simply update your docker-compose file with the new release date and restart your containers. I don’t believe that Huddo uses the ‘latest’ tag, so you will have to check for new releases yourself.
If you want an easier way to control the release date then a search-and-replace in the docker-compose.yml, you could replace the date with ‘${RELEASE_DATE}’ and create a file called ‘.env’ in the same directory as your docker-compose.yml file with the following contents:
RELEASE_DATE=2024-05-27
If you want to move to a new release, you only have to change the date in this file. Also, don’t forget to login to quay.io to be allowed to pull the new container images from Huddo’s repository.
Persistent Volumes
The volumes for the Minio container and Mongo Db are commented out by default. Make them active and configure the correct path. The :Z at the end is needed if you have SELinux configured on your container host, like I do. :Z means that these volumes will be labelled to allow access by these containers and only access by these containers.
Licence
The licence is a multi-line string which you got when you went through the preparation steps. You can always redownload it from your account at store.huddo.com.
Minio and MongoDb images
If you use Docker, when no specific repository is configured, Docker will assume the Docker hub repository (docker.io). Podman doesn’t do that, so if the repository is left out, and you use Podman, you will be asked which repository you want to use. It’s therefore better to include this.
The docker-compose.yml uses the latest tag for the Minio image, where the Helm chart is locked to an older version for backwards compatibility. The Minio image migrated away from filesystem mode to a newer storage system in 2022. As the docker-compose file as provided by Huddo, is more recent, it uses the new storage system (single node, single drive) by default.
Authentication configuration
The settings for authentication are configured in the User container. I had to add some extra variables here for the Keycloak authentication. The variables are listed here.
Other variables
Other variables that need to be set, like the Mongo database user and password and the S3 Minio user and secret speak for itself, I guess. When in doubt, check the documentation.
Configuring Nginx
As explained under the configuring the docker-compose file chapter, there are several setups possible, which will define how to set up your Nginx container. If you want to setup Nginx inside the Huddo Boards network, like Huddo’s docker-compose file suggests, simply use the previously downloaded nginx.conf and change the server_name to your Connections url. That’s all.
In my environment, where I use one Nginx container as reverse proxy for all my containers, I simply had to add these lines to my configuration of my Connections environment:
    location /boards {
            rewrite /boards/(.*) /$1  break;
            proxy_buffering off;
            proxy_cache off;
            proxy_set_header Host $host;
            proxy_set_header Connection '';
            proxy_http_version 1.1;
            chunked_transfer_encoding off;
            client_max_body_size 50M;
            client_body_timeout 120s;
            proxy_pass http://127.0.0.1:8079;
    }

    location /api-boards {
            rewrite /api-boards/(.*) /$1  break;
            proxy_buffering off;
            proxy_cache off;
            proxy_set_header Host $host;
            proxy_set_header Connection '';
            proxy_http_version 1.1;
            chunked_transfer_encoding off;
            client_max_body_size 50M;
            client_body_timeout 120s;
            proxy_pass http://127.0.0.1:3002;
    }
Starting Huddo Boards
To start Huddo Boards, you can now simple type:
docker-compose -f <path-to>/docker-compose.yml up -dNext check the logs for any errors with:
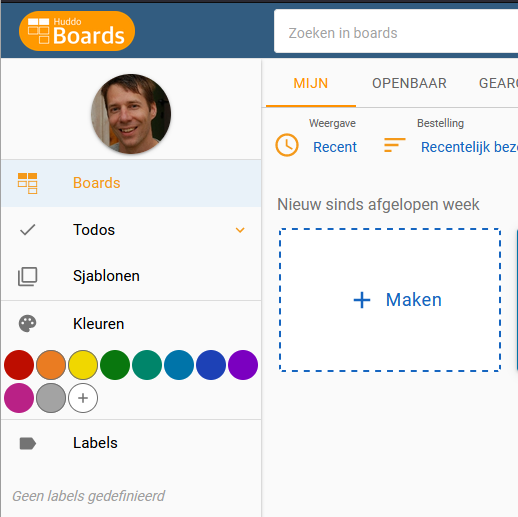
docker-compose -f <path-to>/docker-compose.yml logsThe big test is now to actually open Boards in the browser (https://connections.example.com/boards). If you see something like this, you know Huddo Boards is working:
As I use Podman on my container host, I needed to create a systemd-file to start and stop Boards.
Integrating Huddo Boards in Connections
At this stage, there’s from a functional perspective, no difference between this docker-compose version of Huddo Boards and the Kubernetes version, which means that the integrations for the latter can all be applied to this version. This means that you can add Boards to the apps menu of Connections and add the Huddo Boards widget. If you have Customizer Lite installed as well (which you can install on the same container host as Huddo Boards), you can do the apps menu integration through that, but there are a couple of other integrations that you can configure through Customizer Lite as well.